The Quasimodo (QM) pattern is one of the most effective reversal setups in trading. While many traders focus on bearish setups, the Bullish QM offers equally powerful opportunities when the market shifts from a downtrend to an uptrend.
In this article, we’ll break down a Bullish QM strategy, using a top-down approach—from higher timeframe demand zones to lower timeframe confirmation with divergence.
What Is a Bullish QM Pattern?
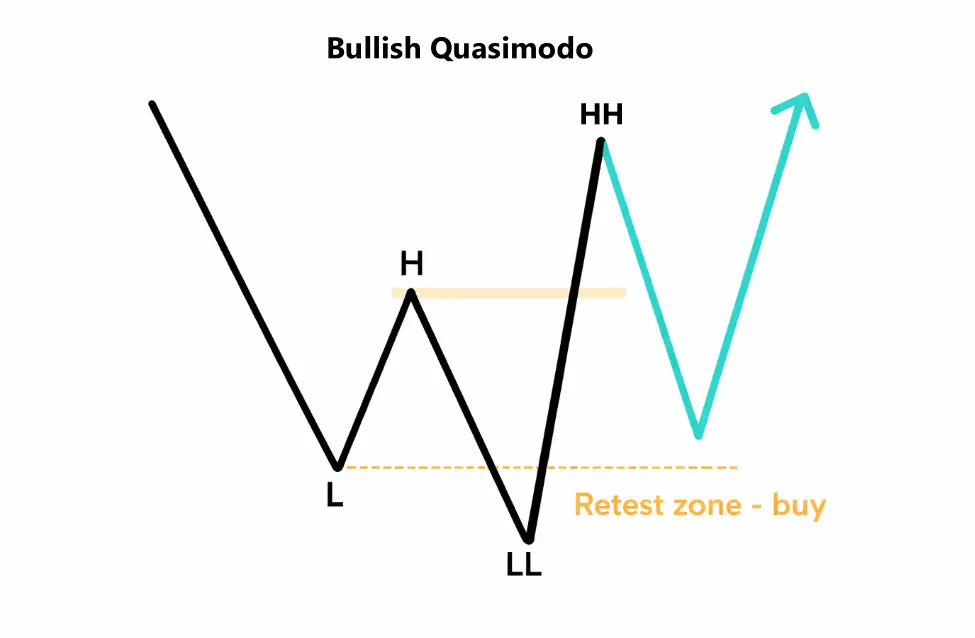
A Bullish Quasimodo (QM) is a reversal structure that signals a potential shift from a downtrend to an uptrend.
Key Structure:
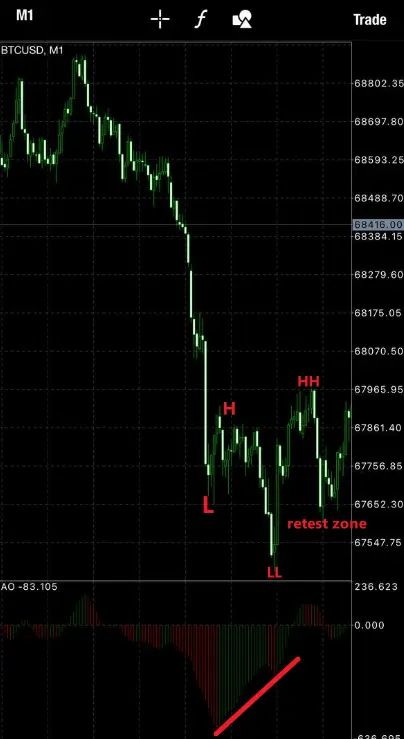
- Price forms a Lower Low (LL)
- Then breaks structure by creating a Higher High (HH)
- Finally, price retraces back to a key level (QM zone)
This retracement is where we look for buy opportunities.
Core Concept
Break of Structure (BOS) + Retest = Entry
The Bullish QM focuses on:
- Liquidity sweeps below lows
- Market structure shift
- Precision entries at demand zones
Step-by-Step Trade Setup (Real Example)
1. Identify Demand on Higher Timeframe
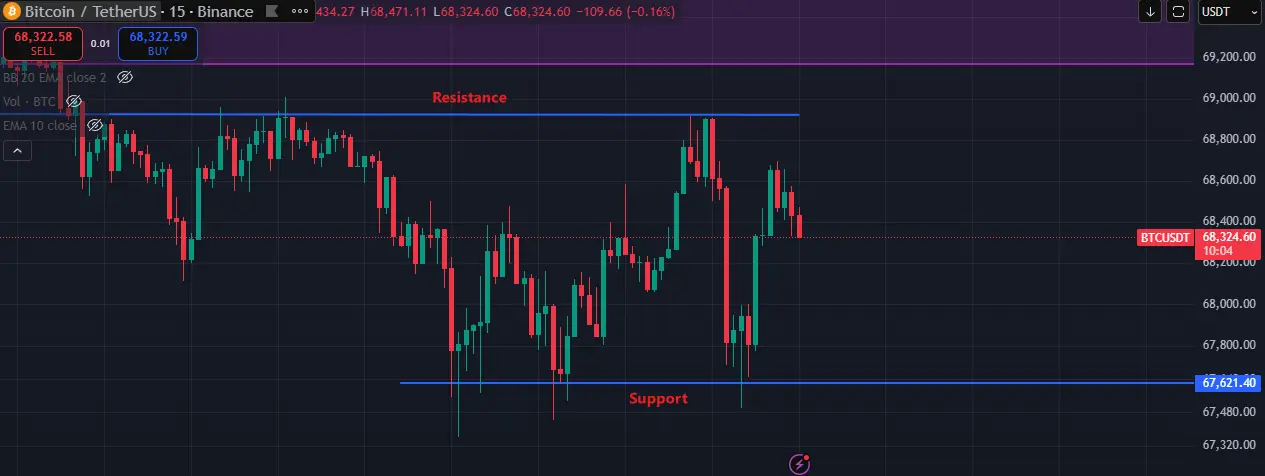
Start with a higher timeframe (e.g. M15 / H1 / H4):
- Mark a clear Demand Area
- Look for zones where price previously reacted strongly
This gives you the bias = BUY
2. Drop to Lower Timeframe
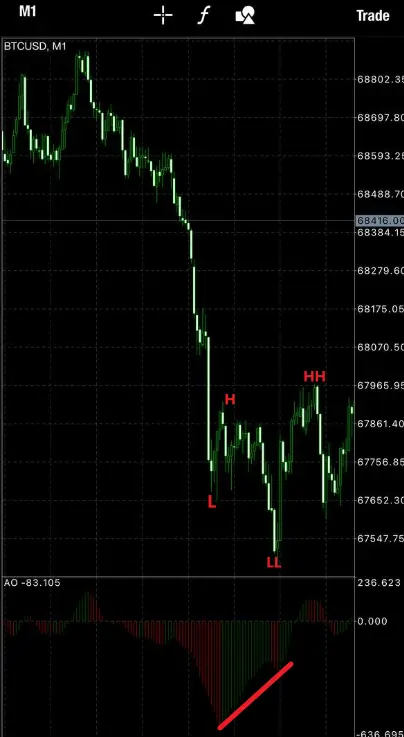
Switch to a lower timeframe (e.g. M1 / M5 / M30) to refine entry.
Look for:
- Market structure shift (LL → HH)
- Formation of a QM pattern
- Price returning to the retest zone
3. Add Confirmation (AO Divergence)
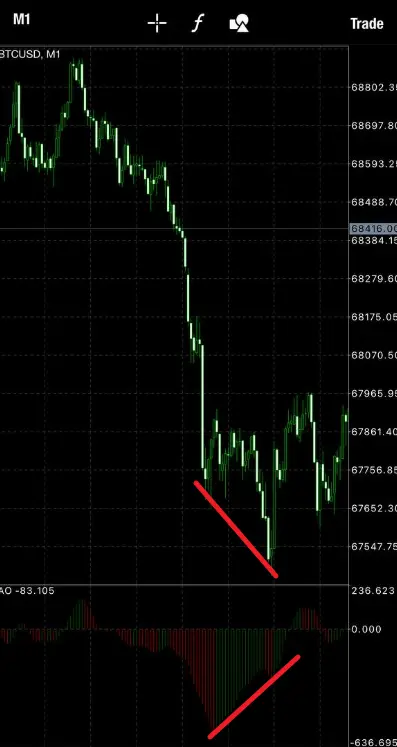
In this setup:
- The Awesome Oscillator (AO) shows bullish divergence
- Price makes lower lows, but momentum weakens
This signals that sellers are losing strength
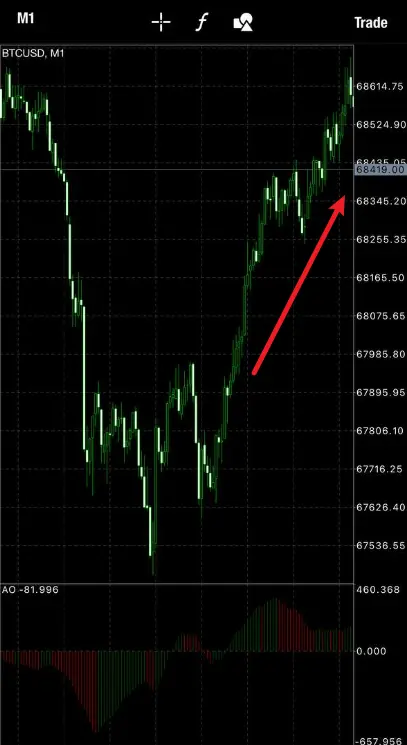
4. Entry at QM Retest Zone
When price returns to the QM level:
- Enter a Buy trade
- This zone often aligns with:
- Demand area
- Liquidity zone
- Imbalance
Trade Execution Plan
- Entry: At QM retest zone
- Stop Loss: Below the recent Lower Low
- Take Profit: Previous highs / next resistance
Common Mistakes to Avoid
❌ Entering before structure is broken
❌ Ignoring higher timeframe demand
❌ No confirmation (divergence / rejection)
❌ Trading in choppy markets
Why This Setup Works
- Combines HTF demand + LTF confirmation
- Captures liquidity sweeps below lows
- Provides tight stop loss & high RR
- Aligns with smart money concepts
HTF Demand + LTF QM + Divergence = Buy Opportunity
Final Thoughts
The Bullish QM setup is a powerful way to catch market reversals with precision.
When you combine:
- Higher timeframe Demand
- Lower timeframe QM structure
- Momentum confirmation like AO divergence
You create a high-probability trading edge.
Consistency comes from patience, not prediction.
Want to learn bearish setups?
Read: Bearish QM Strategy
About the Author
David William – Professional Forex & Crypto Trader
More trading insights at trading-strategy-hub.com
Disclaimer: This analysis is for educational purposes only and does not constitute financial advice.