The Quasimodo (QM) pattern is one of the most powerful reversal setups in trading. It focuses on market structure shifts, liquidity grabs, and precise entries, making it a favorite among price action and smart money traders.
In this article, we’ll break down a Bearish QM setup, using a top-down approach—from higher timeframe supply to lower timeframe confirmation.
What Is a Bearish QM Pattern?
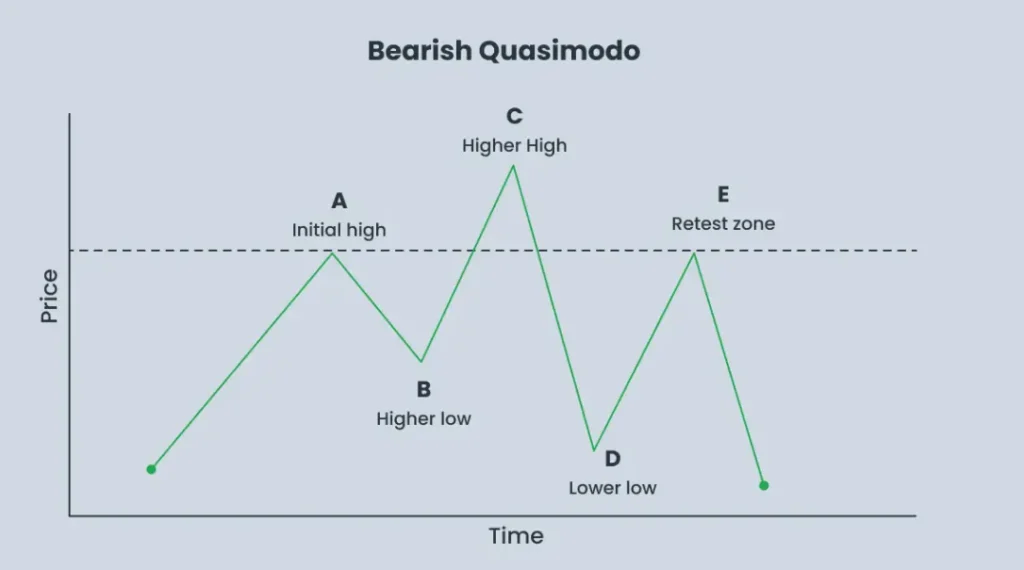
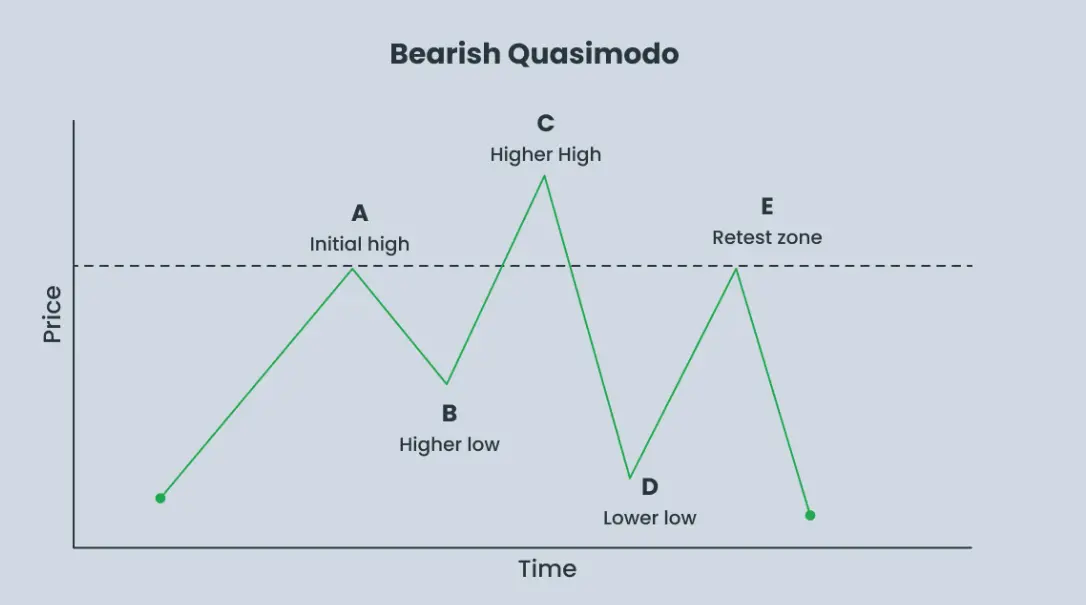
A Bearish Quasimodo (QM) is a reversal structure that signals a potential shift from an uptrend to a downtrend.
Key Structure:
- Price forms a Higher High (HH)
- Then breaks structure by creating a Lower Low (LL)
- Finally, price retraces back to a key level (QM zone)
This retracement is where we look for short (sell) opportunities.
Core Concept
Break of Structure (BOS) + Retest = Entry
Unlike traditional patterns, QM focuses on:
- Liquidity traps (false breakouts)
- Structural shifts
- Precision entries at imbalance zones
Step-by-Step Trade Setup (Real Example)
1. Identify Supply on Higher Timeframe (H4)
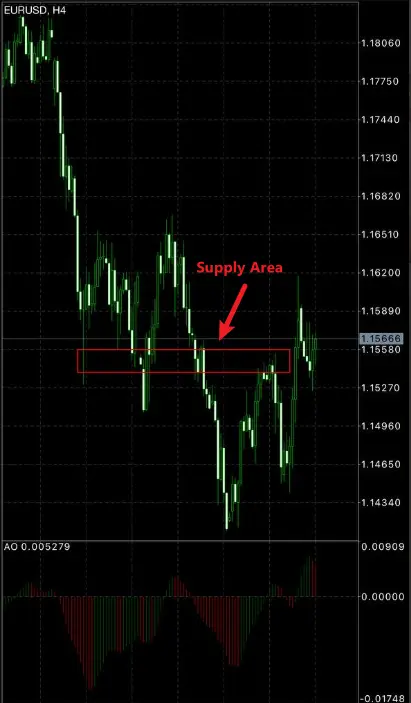
Start with the 4-hour chart:
- Mark a clear Supply Area
- Look for zones where price previously reacted strongly
This gives you the bias = SELL
2. Drop to Lower Timeframe (M30)
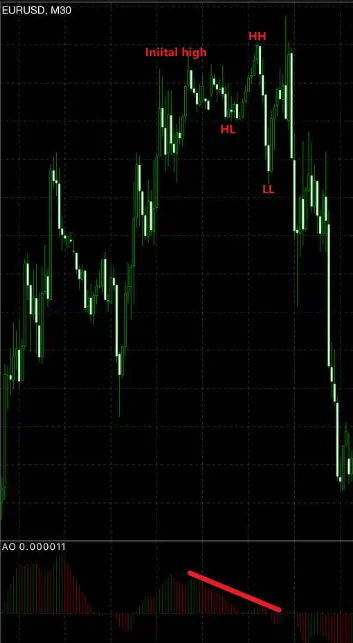
Switch to the 30-minute chart to refine your entry.
Look for:
- Market structure shift (HH → LL)
- Formation of a QM pattern
- Price returning to the retest zone
3. Add Confirmation (AO Divergence)
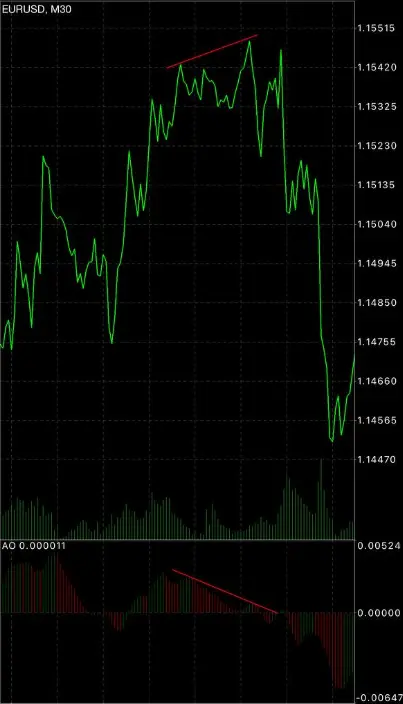
In this setup:
- The Awesome Oscillator (AO) shows bearish divergence
- Price makes higher highs, but momentum weakens
This confirms that buyers are losing strength
4. Entry at QM Retest Zone

Once price returns to the QM level:
- Enter a Sell trade
- This area often aligns with:
- Supply zone
- Liquidity zone
- Imbalance
Trade Execution Plan
- Entry: At QM retest zone
- Stop Loss: Above the recent Higher High
- Take Profit: Previous lows / next support
Common Mistakes to Avoid
- ❌ Entering before structure is broken
- ❌ Ignoring higher timeframe bias
- ❌ Trading QM in a sideways market
- ❌ No confirmation (divergence / rejection)
Why This Setup Works
- Combines HTF supply + LTF confirmation
- Captures liquidity grabs
- Provides tight stop loss & high RR
- Aligns with smart money concepts
Final Thoughts
The Bearish QM setup is not just a pattern—it’s a story of market manipulation and reversal.
When you combine:
- Higher timeframe Supply
- Lower timeframe QM structure
- Momentum confirmation like AO divergence
You get a high-probability trading setup.
Simple Summary
HTF Supply + LTF QM + Divergence = Sell Opportunity
If used with patience and discipline, the QM strategy can become a core edge in your trading system.
Want to learn bullish setups?
Read: Bullish QM Strategy
About the Author
David William – Professional Forex & Crypto Trader
More trading insights at trading-strategy-hub.com
Disclaimer: This analysis is for educational purposes only and does not constitute financial advice.